React Native is a framework created by Facebook that simplifies development of cross-platform mobile applications. In a nutshell, React Native code is automatically translated to native code for both Android and iOS. It's no wonder that this framework is becoming increasingly popular among developers. In this article, we’re going to explore how to use feature flags in this environment so you have all the tools necessary for great mobile development.
Note: I am using React Native CLI and TypeScript and developing on Windows for Android. For more information about setting up and developing on other operating systems, you can consult the official documentation.
What are Feature Flags
In mobile development, it’s especially important to avoid redeploying code, as app stores take a while to approve changes. However, sometimes features need to be turned on and off dynamically. That’s where feature switches come into play. These flags are mechanisms that give you the ability to enable or disable a feature remotely, without having to redeploy the code and wait for its approval. Once integrated into the app, the flag can be turned on and off at any time by simply pressing a button. Plus, feature toggles can be used for A/B testing and user segmentation. For now, let’s explore how you can quickly integrate feature flags inside a new React Native application.
Feature Flags in React Native
In this tutorial, I’m going to create a simple login page for a mobile app.
Picture this: you have an app where signing up should be restricted - you want to be able to stop people from signing up, but not prevent already-existing users from logging in. A simple solution is to use a feature switch that toggles the “Signup” button on and off. In this way, you get to stop new registrations at any time with no waiting period. Similarly, when you want to allow new users, you can turn it on just as easily.
I’ll be using ConfigCat’s feature flag service to handle my flag and I’ll walk you through every step of the way. Essentially, we’re making a button (the feature) appear or disappear by controlling an outside “variable”. Without further ado - let’s create our app. You can find the completed code here.
Prerequisites
- Node.js 14 or newer
- Java SDK 11 or newer
- Android Studio
- Android SDK 12
- JavaScript/TypeScript, HTML, CSS knowledge
- An IDE (I’m using VS Code, but anything works)
Setting up
If you haven’t used React Native before, you’ll first need to install its CLI. Open a new command prompt and paste the following command:
npm install -g react-native-cli
Once that’s done, go ahead and create the project. I’m using a TypeScript interface for this.
npx react-native init loginProject --template react-native-template-typescript
This may take a while, but once it’s done, it’s time to install the ConfigCat SDK. Since React Native is a JavaScript framework, we’re going to choose the JavaScript SDK and install it now. In a cmd type:
npm i configcat-js
Next, it’s time to start the app for the first time.
cd loginProject
npx react-native start
First, navigate to the project folder. Then, using the “start” command, open up Metro, the JavaScript bundler that ships with React Native. Now, without closing this cmd, open up another one (still in the project’s folder) and type the following:
npx react-native run-android
The first time, it could take a minute or two for the Android emulator to start up and bundle the application, but once it’s done you should see the following screen:
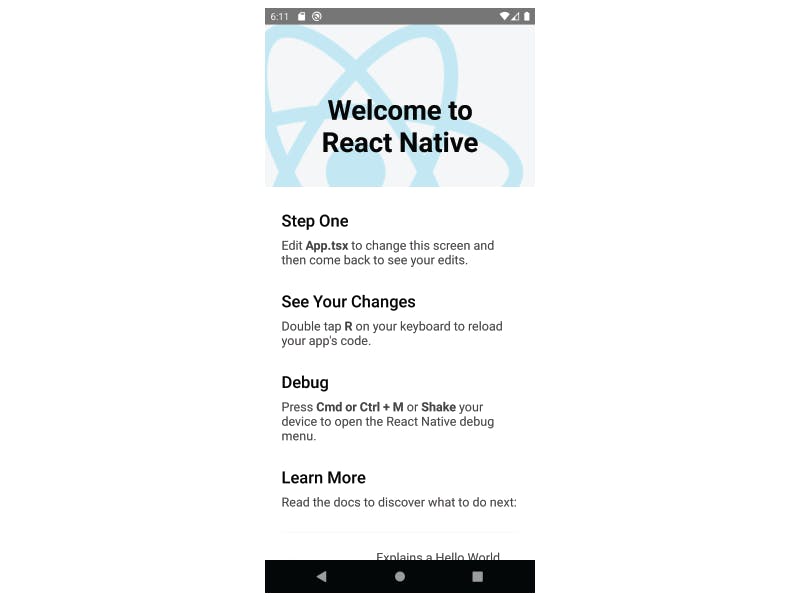
Great! Now it’s time to get coding. Open up the project in a code editor and head to App.tsx. Go ahead and delete the entire content of this file and then paste the following:
import React, { useState } from 'react';
import {View, Text, TouchableOpacity, StyleSheet} from 'react-native';

const App = () => {

    const styles = StyleSheet.create({
      content: {
          flex:1,
          flexDirection:'column',
          justifyContent:'center',
          alignItems: 'center',
      },
      button: {
        backgroundColor: '#4CBE72',
        borderRadius: 10,
        margin: 12,
        height: 40,
        width: 200,
        justifyContent: 'center',
        alignItems:'center'
      },
    })


    return (
        <View style={styles.content}>
            <TouchableOpacity activeOpacity={0.5} style={styles.button}>
                <Text>LOGIN</Text>
            </TouchableOpacity>

            <TouchableOpacity activeOpacity={0.5} style={styles.button}>
                <Text>SIGNUP</Text>
            </TouchableOpacity>
        </View>
    )
}


export default App;
Let’s see what’s going on. First, I’ve imported a bunch of necessary React components and then created my own App component. Inside it, there’s a Login and a Signup button created using TouchableOpacity. To make everything look nicer, I’ve also added a bit of styling to the component. After saving the code, you should see this:
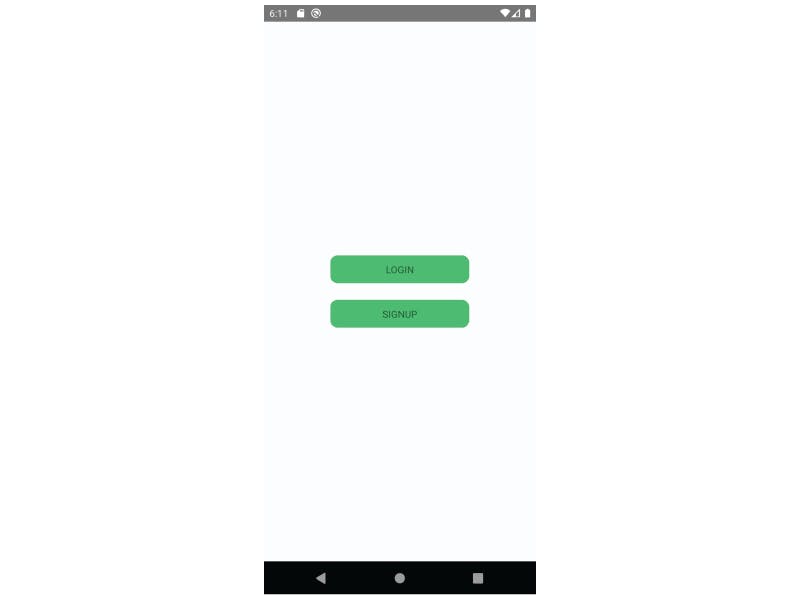
So far, so good. But the fun is just beginning.
Creating a Feature Flag
Naturally, we want to change the signup button so it can be handled dynamically. For that, we first need a flag. Head over to the ConfigCat Dashboard, create an account if you don’t have one already, and log in. On your dashboard, click the “Add Feature Flag” button and create the new signup flag like in the picture below:
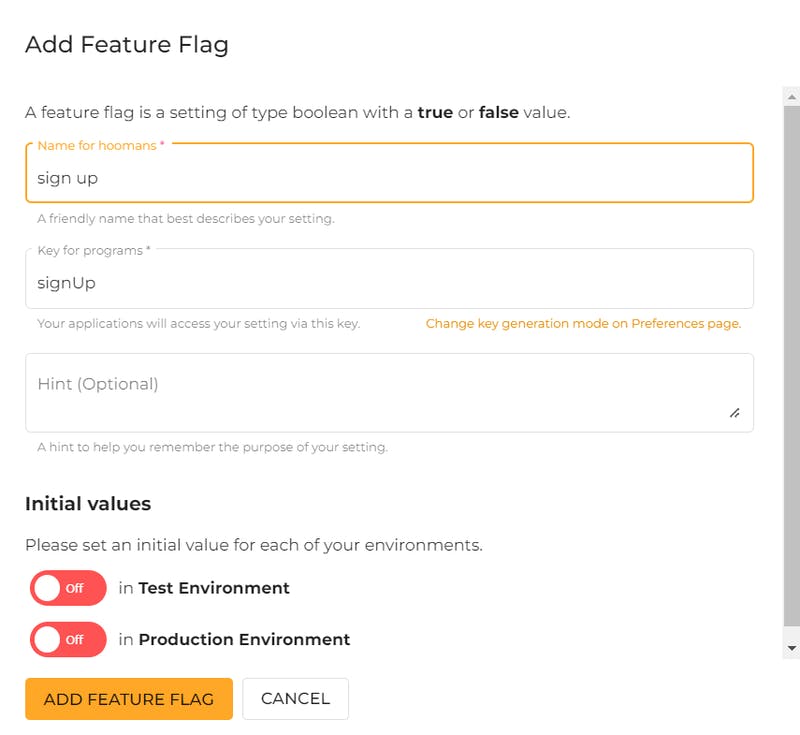
Now, locate your SDK key on the right-hand side of the screen. You’re going to need this to connect your application to your account in just a minute.

Adding the feature flag
To add the flag to your application, you’ll first need to import the SDK into your component.
import * as configcat from "configcat-js";
Then, you need a variable in which the value of the flag is going to be stored locally. To do that, I’ve used useState, a React hook.
const [flagValue, setFlagValue] = useState();
Now, create a ConfigCat client that automatically pools every 10 seconds to check if the flag value has been changed. Don’t forget to add your own SDK key at this step.
let configCatClient = configcat.createClientWithAutoPoll("YOUR-SDK-KEY", {
    pollIntervalSeconds: 10,
  },
);
To get the actual value and store it inside the flagValue variable, add the following function:
const updateFlagValue = () => {
  configCatClient.getValueAsync("signUp", false)
  .then(value => {setFlagValue(value)})
}
Every time this function is called, the ConfigCat client will take the flag value and store inside our local variable. But when should this function be called? Well, every time the flag changes, right? Since we’re checking every 10 seconds, we should update the client to also call the updateFlagValue method every time it detects a change. For this, I used the configChanged callback function like in the lines below:
let configCatClient = configcat.createClientWithAutoPoll("8z7aCC-DZEaPwUCnitpksg/TbJ8oi7sMUynCb8MxtTUDw", {
    pollIntervalSeconds: 10,
    configChanged: () => {
      updateFlagValue();
  },
  });
Every 10 seconds, the client will check if the flag’s value has been changed, and if it has, it will call updateFlagValue, which will update the local variable.
All that is left to do is to modify the return statement of the App component, so that the Signup button is only displayed when the flag is turned on. For that, I made use of React's ternary operator. What this does is check if flagValue is true and display a View which contains the button. Otherwise, nothing is displayed.
 return (
    <View style={styles.content}>
      <TouchableOpacity activeOpacity={0.5} style={styles.button}>
        <Text>LOGIN</Text>
      </TouchableOpacity>

      {
        flagValue
        ?
        <View>
          <TouchableOpacity activeOpacity={0.5} style={styles.button}>
            <Text>SIGNUP</Text>
          </TouchableOpacity>
          <Text>Signing up is now open again! </Text>
        </View>
        : null

      }
    </View>
  )
Toggling Features
When you first created the flag, it was automatically turned off, so you shouldn’t see the Signup button right now. Head over to the dashboard, turn the flag on and publish the results.

Now, if you wait a few seconds, your app will automatically update and the Signup button will appear.
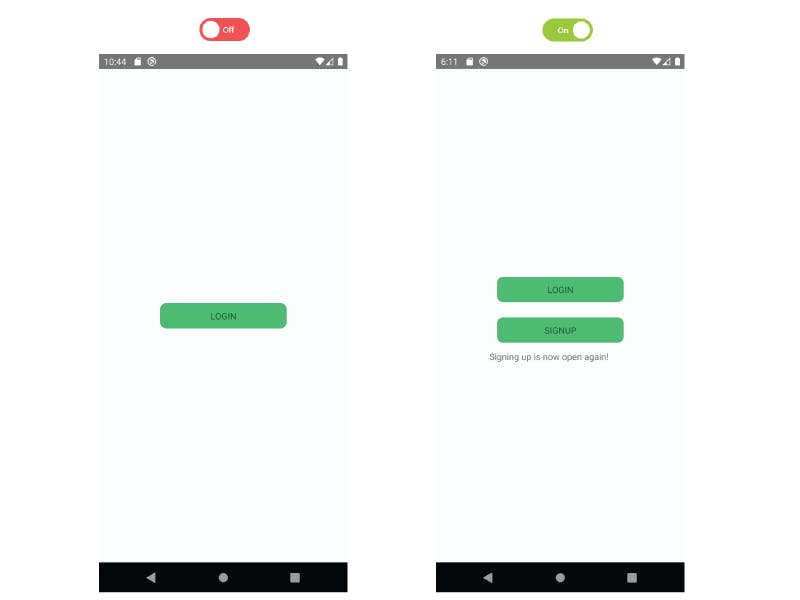
And just like that, you turned on a new feature and made it easy to turn off at any time from the dashboard, with no additional code deployment.
Key Takeaways
In this article, I’ve walked you through using feature flags in a mobile application. Let’s recap the steps:
- Create a simple React Native app.
- Install the ConfigCat JavaScript SDK.
- Create a ConfigCat account and a feature flag.
- Add the flag to your app to handle a simple feature.
Feature flags are powerful tools that allow developers to enable features dynamically without redeploying code, but they can also help in a few other scenarios. They can be easily integrated to help with user testing and allow for detailed segmentation. There’s a plenitude of reasons why using them should be on your mind after reading this article.
If you’re looking for more information, check out ConfigCat's website. You can also keep up to date with the newest developments by following ConfigCat on Linkedin, Twitter or Facebook.
